Fundacja z uśmiechem

Wyszukiwarka w serwisie

Detecting oral cancer - the exam review


Detecting Oral Cancer: A Guide for Health Care Professionals                                                                                           

The Exam Review    

A thorough head and neck examination should be a routine part of each patient dental visit and general medical examination. Clinicians should be particularly vigilant in checking those who use tobacco or excessive amounts of alcohol.
 
• Examine your patients using the head and neck exam illustrated in this program. 
• Take a history of their alcohol and tobacco use. 
• Inform your patients of the association between tobacco use, alcohol use, and oral cancer. 
• Follow-up to make sure a definitive diagnosis is obtained on any possible signs or symptoms of oral cancer.
The Exam
This exam is abstracted from the standardized oral examination method recommended by the World Health Organization. The method is consistent with those followed by the Centers for Disease Control and Prevention and the National Institutes of Health. It requires adequate lighting, a dental mouth mirror, two 2" x 2" gauze squares, and gloves; it should take no longer than 5 minutes.
 
The examination is conducted with the patient seated. Any intraoral prostheses are removed before starting. The extraoral and perioral tissues are examined first, followed by the intraoral tissues.
 
I. The Extraoral Examination
 
FACE: (Figure 1) The extraoral assessment includes inspection of the face, head, and neck. The face, ears, and neck are observed, noting any asymmetry or changes on the skin such as crusts, fissuring, growths, and/or color change. The regional lymph node areas are bilaterally palpated to detect any enlarged nodes. If enlargement is detected, the examiner should determine the mobility and consistency of the nodes. A recommended order of examination includes the preauricular, submandibular, anterior cervical, posterior auricular, and posterior cervical regions. 
 
1
 

II. Perioral and Intraoral Soft Tissue Examination

 
The perioral and intraoral examination procedure follows a seven-step systematic assessment of the lips; labial mucosa and sulcus; commissures, buccal mucosa, and sulcus; gingiva and alveolar ridge; tongue; floor of the mouth; and hard and soft palate.

LIPS - (figure 2): Begin examination by observering the lips with the patients mouth both closed and open. Note the color, texture and any surface abnormalities of the upper and lower vermilion borders.
 
 2
 
LABIAL MUCOSA: (Figures 3 and 4) With the patients mouth partially open, visually examine the labial mucosa and sulcus of the maxillary vestibule and frenum and the mandibular vestibule. Observe the color, texture, and any swelling or other abnormalities of the vestibular mucosa and gingiva.
 

 34


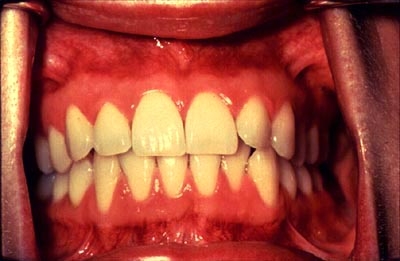
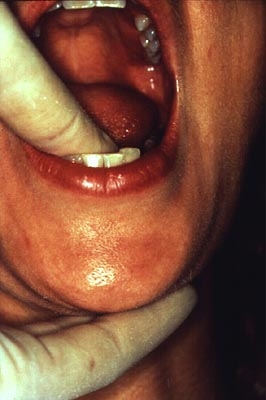
BUCCAL MUCOSA: (Figures 5 and 6) Retract the buccal mucosa. Examine first the right then the left buccal mucosa extending from the labial commissure and back to the anterior tonsillar pillar. Note any change in pigmentation, color, texture, mobility, and other abnormalities of the mucosa, making sure that the commissures are examined carefully and are not covered by the retractors during the retraction of the cheek.


 56


GINGIVA: (Figure 7) First, examine the buccal and labial aspects of the gingiva and alveolar ridges (processes) by starting with the right maxillary posterior gingiva and alveolar ridge and then move around the arch to the left posterior area. Drop to the left mandibular posterior gingiva and alveolar ridge and move around the arch to the right posterior area
 
 
7
 
Second, examine the palatal and lingual aspects as had been done on the facial side, from right to left on the palatal (maxilla) and left to right on the lingual (mandible).

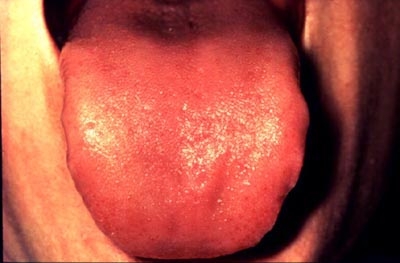
TONGUE: (Figure 8) With the patients tongue at rest, and mouth partially open, inspect the dorsum of the tongue for any swelling, ulceration, coating, or variation in size, color, or texture. Also note any change in the pattern of the papillae covering the surface of the tongue and examine the tip of the tongue. The patient should then protrude the tongue, and the examiner should note any abnormality of mobility or positioning.


 8


(Figure 9) With the aid of mouth mirrors, inspect the right and left lateral margins of the tongue


9


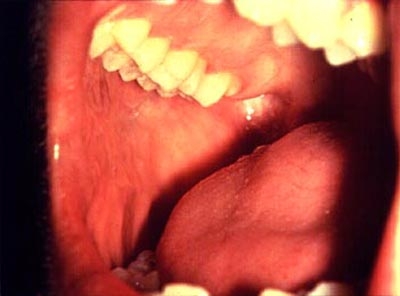
 (Figure 10) Grasping the tip of the tongue with a piece of gauze will assist full protrusion and will aid examination of the more posterior aspects of the tongue lateral borders


10


 (Figure 11) Then examine the ventral surface. Palpate the tongue to detect growths


11


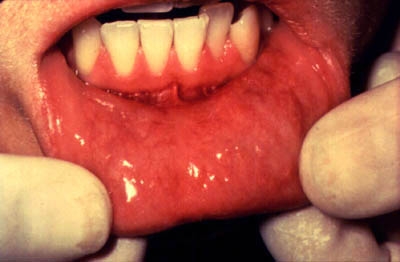
FLOOR: (Figure 12) With the tongue still elevated, inspect the floor of the mouth for changes in color, texture, swellings, or other surface abnormalities.


12


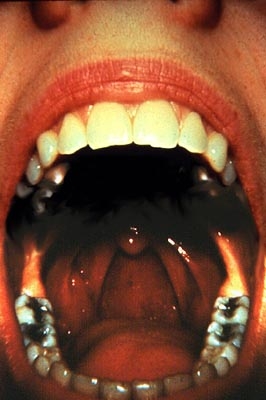
PALATE: (Figures 13 and 14) With the mouth wide open and the patients head tilted back, gently depress the base of the tongue with a mouth mirror. First inspect the hard and then the soft palate.


 13


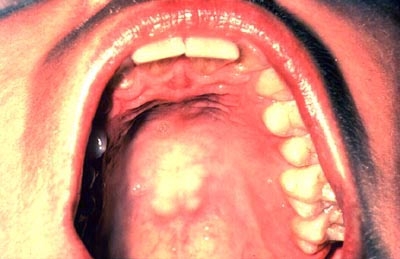
(Figure 14) Examine all soft palate and oropharyngeal tissues


 14


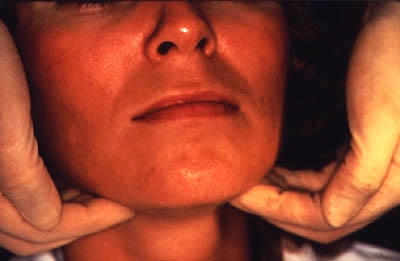
(Figure 15) Bimanually palpate the floor of the mouth for any abnormalities. All mucosal or facial tissues that seem to be abnormal should be palpated


 15


Oral Lesions Suspicious for Oral Cancer


16


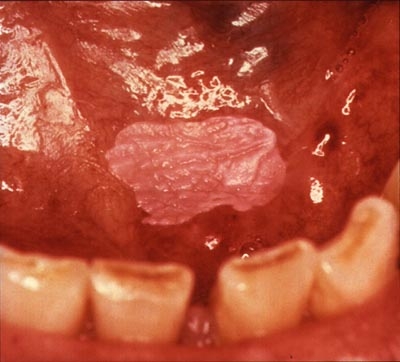
Homogenous leukoplakia in the floor of the mouth in a smoker. Biopsy showed hyperkeratosis


17


 Clinically, a leukoplakia on left buccal mucosa. However, the biopsy showed early squamous cell carcinoma. The lesion is suspicious because of the presence of nodules


18


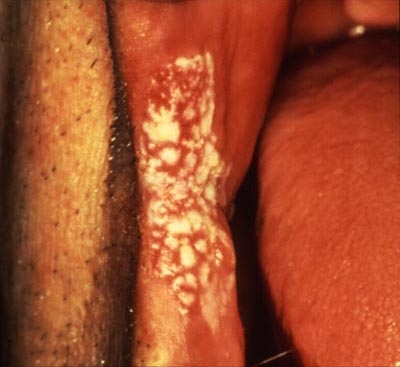
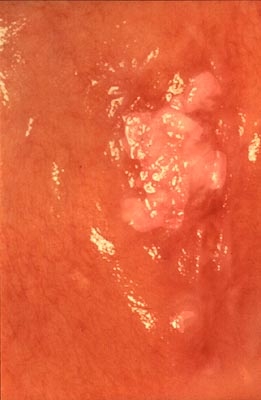
Nodular leukoplakia in right commissure. Biopsy showed severe epithelial dysplasia


 19


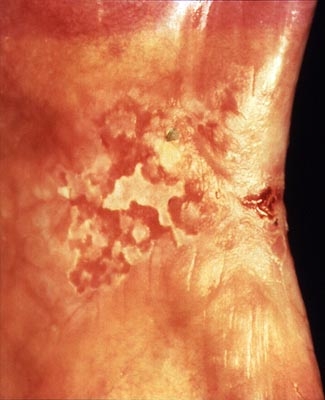
Erythroleukoplakia in left commissure and buccal mucosa. Biopsy showed mild epithelial dysplasia and presence of candida infection. A 2-3 week course of anti-fungal treatment may turn this type of lesion into a homogenous leukoplakia.


Revised March 2011


Facebook